I wrote this blog post last year which you may also enjoy; it contains information about the history of dying eggs. I’ve updated the instructional portion with new pictures and additional tips. The other thing I love about this activity with children is foraging for the botanicals . . . it helps me teach them about wildcrafting and opens the door to pass on in the Wise Woman tradition.
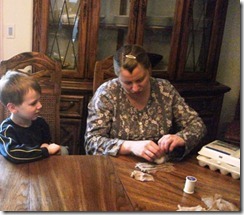 My favorite activity around the approach of Easter is to gather natural materials and ingredients to make colored Easter eggs with leaf and flower imprints. This is a favorite tradition started when my girls were little and now carried on with the grandchildren.
Here are ingredients to gather to make the natural dye, arranged by color they will produce in final dyed egg:
Brown and tan: Outer layers of onions, black/green tea, coffee, black walnut hulls
Yellow: Tumeric, cumin, saffron, lemon rinds
Orange: Paprika, chili powder, carrots
Red: Fresh cranberries, cherries, raspberries, Spanish onion skins
Purple and blue: Blueberries, boiled red cabbage leaves, beets
Green: Spinach
Grey or slightly lavender: Hibiscus flowers
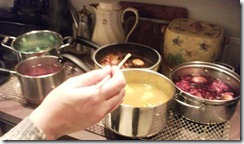
Combine the dye source (you can use single botanical source, or combine several for differing hues) with 1 Tablespoon vinegar and cold water in a saucepan. There are two different methods. You can boil the eggs and dyes separately, strain the dye and add hard-boiled eggs in the shell to the hot liquid and let it soak until it reaches the desired hue. Or, you can wrap uncooked eggs and cook them in the dye as they are being colored. With the former method, if the eggs need to soak for more than 2 hours to reach the desired deepness of color, you may want to move them to the refrigerator if you will be eating them. Generally, however, natural dyes are going to create more earth-like subdued colors. You can also cook all dye materials (the longer, the darker), cool and add uncooked eggs, reheat to cook egg and set aside to continue darkening the dye while cooling. (Refrigerate if over 2 hours.) If you want to have botanical impressions on your eggs, do the following before you cook the eggs:
Here are the things you want to have on hand:
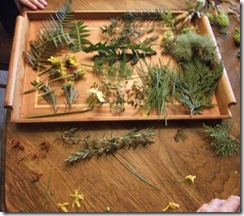 Fresh herb, plant and flower cuttings. The smaller the better, however, wrapping a large fern that covers an entire egg is a stunning design when finished. Thinner, flat items are easiest to secure tightly. Use your imagination. Dandelion flowers will impart a bright yellow splotch in the finished egg, adding a whimsical touch. Other fresh botanicals will add a bit of their own color, along with imprinted texture and form. It’s fun to let the process itself randomly influence the outcome. Children love to do this; it’s biochemistry and art all in one . . . plus you get beautiful eggs to add to the Easter hunt or to share.
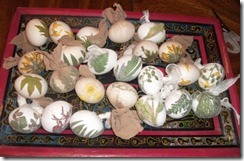 Pantyhose or cheesecloth, cut in squares that can be tied with twisty ties or rubber bands to snugly keep plant material in place. If re-using nylon squares or cheesecloth, be sure to rinse between eggs. You’ll want a slotted spoon to turn and remove the eggs while they are in the dye bath, and you’ll want a couple of brown paper bags cut and laid flat to place eggs on to partially dry as you remove pantyhose or cheesecloth and botanicals.
 Here are some tips: Older eggs work best, buy them at least a week before boiling as newer eggs are hard to peel. I think white eggs take the natural dyes better, plus you can create additional designs with wax to add bright white to the creation before putting on leaves and flowers. Shine up
 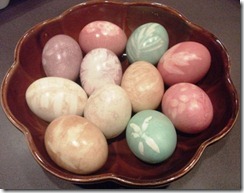 finished eggs when they are dry with a little olive oil rubbed in. Eat those eggs! Don’t waste them – make deviled eggs, egg salad or use in a salad. Be sure to keep them refrigerated if you will be eating them. Most of all, have fun, and encourage your children to experiment; you’ll learn new ideas from them. If you do this project this year, send us
 pictures of your creations attached as a .jpg in an email: samara@wingedseed.com, including your current mailing address and we’ll send an aromatic surprise back.
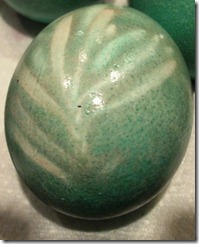
The large one pictured here was done with a Rosemary sprig. Isn’t it lovely?
Happy Easter and Spring!